Growing Vegetable Scraps!
What you need: And either:
A jar, glass or cup Romaine lettuce
Water Potatoes
Toothpicks (optional) Any type of dry bean and cotton balls
Or Spring onions
- Potatoes
- When a potato starts to go off, it grows these roots from what look like dark circles.

- Pick a potato that is thin enough to fit wedged into a glass (like in the photo below) and has roots growing already (if none of your potatoes fit you can use toothpicks to submerge a part of the potato), and place the potato wedged in the jar so that roughly a third of it is submerged (under water)

- Place the jar in a spot that gets good sunlight throughout the day, and replace the water every few days or whenever it gets low or dirty
- The potato will after a few weeks start to rot if it stays in water, so if you want the plant to thrive you can either pot it in soil, or throw it out and start again with the next potato
- It can take years for these plants to grow big enough to make new potatoes, but they quickly grow vines and work well as house plants.

- Lettuce
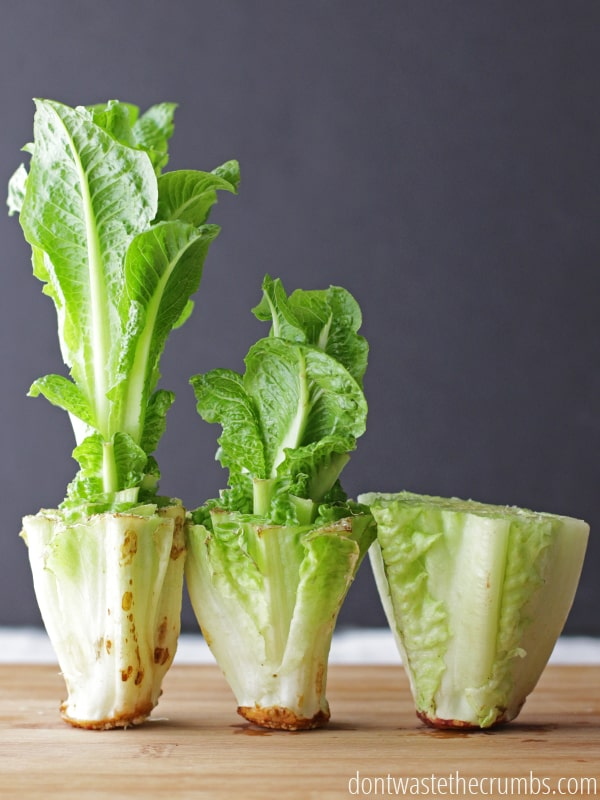
- Lettuce scraps (romaine lettuce tends to work best, although you could try to experiment with different types
and see how each grow differently)
Method:
- To start, cut the leaves off the base of the lettuce, leaving about 2 inches of the bottom.
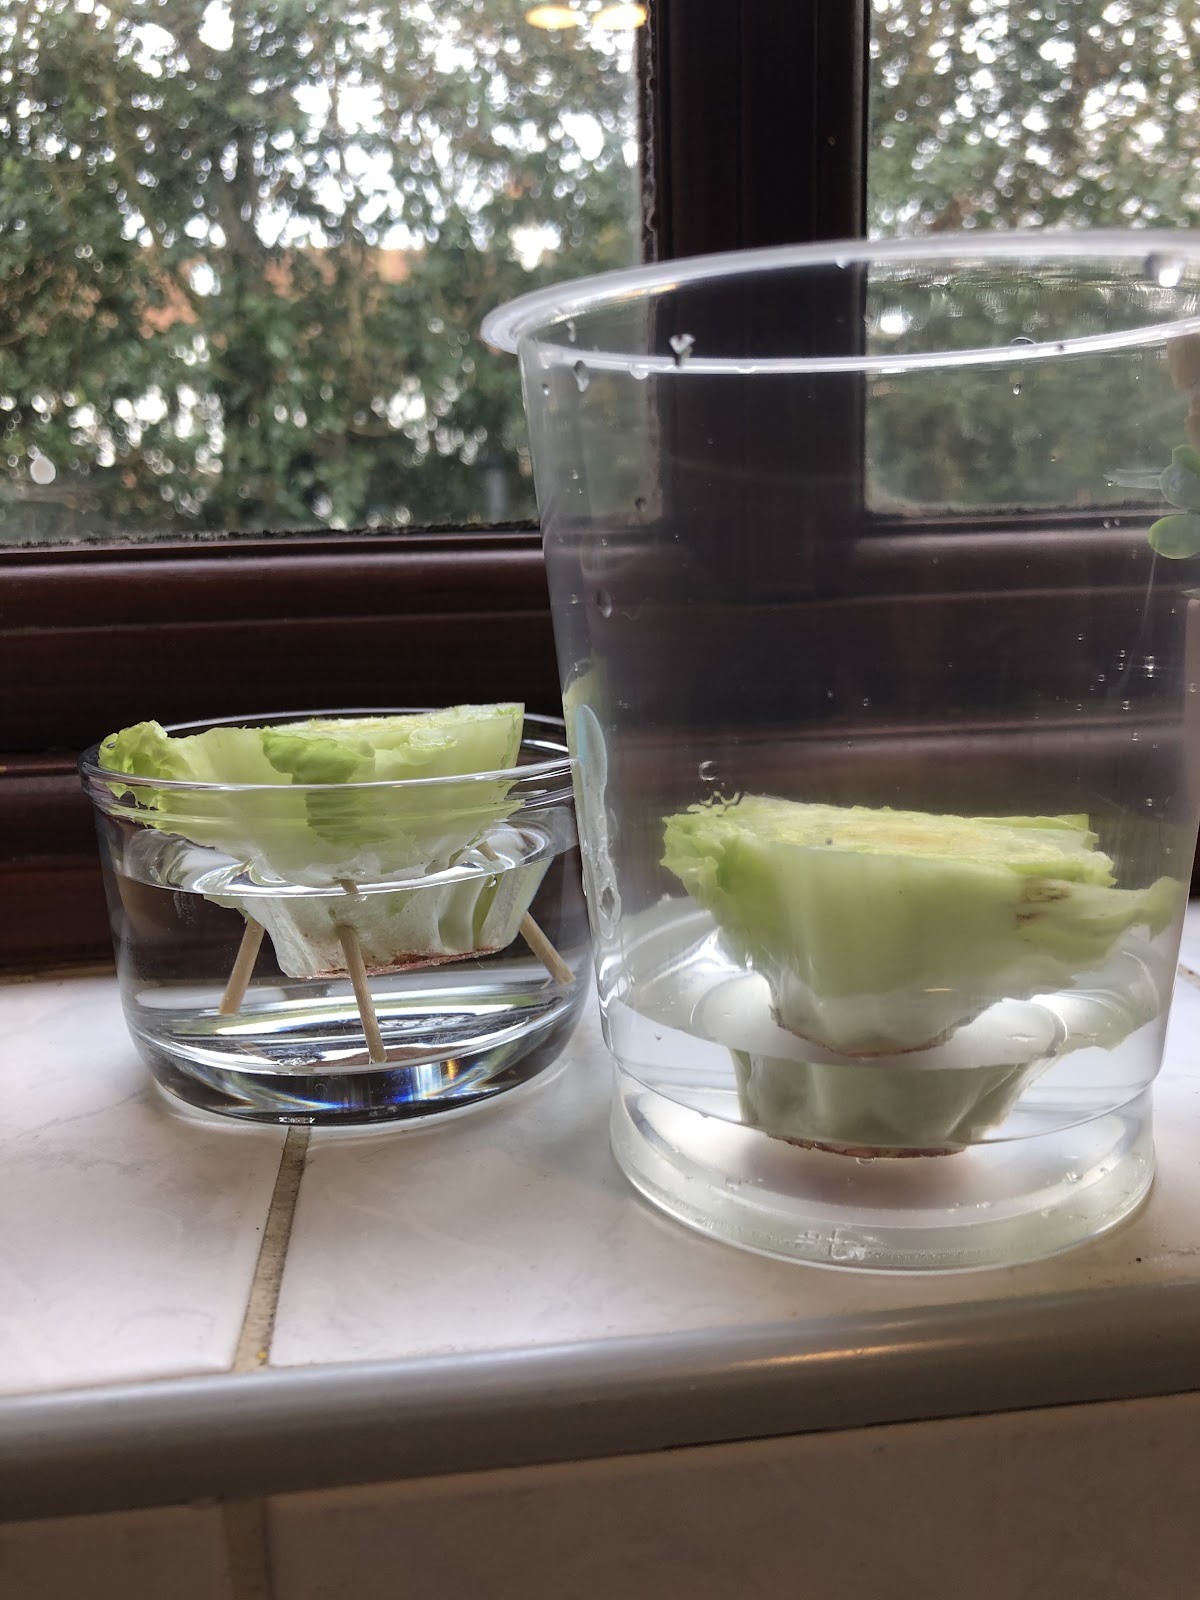
- If the stem is slightly larger, you can use three toothpicks placed evenly into the base to help hold it up right.
- You can then place the base into a container with enough water to cover at around half of the lettuce base. You can use any container that will fit the lettuce, such as a jar, vase, glass, or a clean recycled food container. If the container is particularly light, you can also use clean rocks placed in the bottom to help weigh it down.
- Place the plant on a sunny windowsill, although be careful in very hot sunny weather as the lettuce can get scorched.
- Then make sure to change the water every other day, and hopefully within a few days you will see your lettuce begin to grow.
- After around 12 days, your lettuce should be ready to harvest and eat!
- If after a week or so nothing has happened, it may mean there is an issue with the lettuce, so it may be best to try again with another scrap.

You can also try this method with celery! Just follow the steps and when it starts to get bigger you can try planting it in some soil!
- Growing Beans in Cotton Balls:
Choose the types of dry beans you want to grow. You can grow any type of dry bean using cotton balls.

Soak the beans in water overnight to speed up the growing process. Place the beans into a bowl or cup and fill it with water. Then, let the beans soak in the water at room temperature overnight. This will help to soften up the outer shells of the beans and make it easier for the plants to sprout.
- Don’t use hot water as this could partially cook the beans. Use cool or lukewarm tap water.

Fill a plastic cup or glass jar about 3/4 full of cotton balls.

Stuck one bean on either side of the jar so that you could watch 2 growing at once.

Water it until the cotton wool is damp but not too wet, and place the jar in the window.
- Within 2-3 days the bean will start to sprout a small root, and 2-3 days later it will grow these little tendrils.


- Another 4-5 days and the bean will develop a large network of shoots coming off the main root, and a sturdy stem grows straight upwards and above the top of the cotton wool.

- And finally, 4-5 days later the beans will be growing very steadily, tall and spindly with large leaves seeking out more sunlight.

- You can carefully remove them from the jar and examine the complex network of roots that had! Then you can tease the roots off the cotton wool and replant the beans into soil in pots in the garden. Don’t forget to water them and keep watching the rapid growth outside!
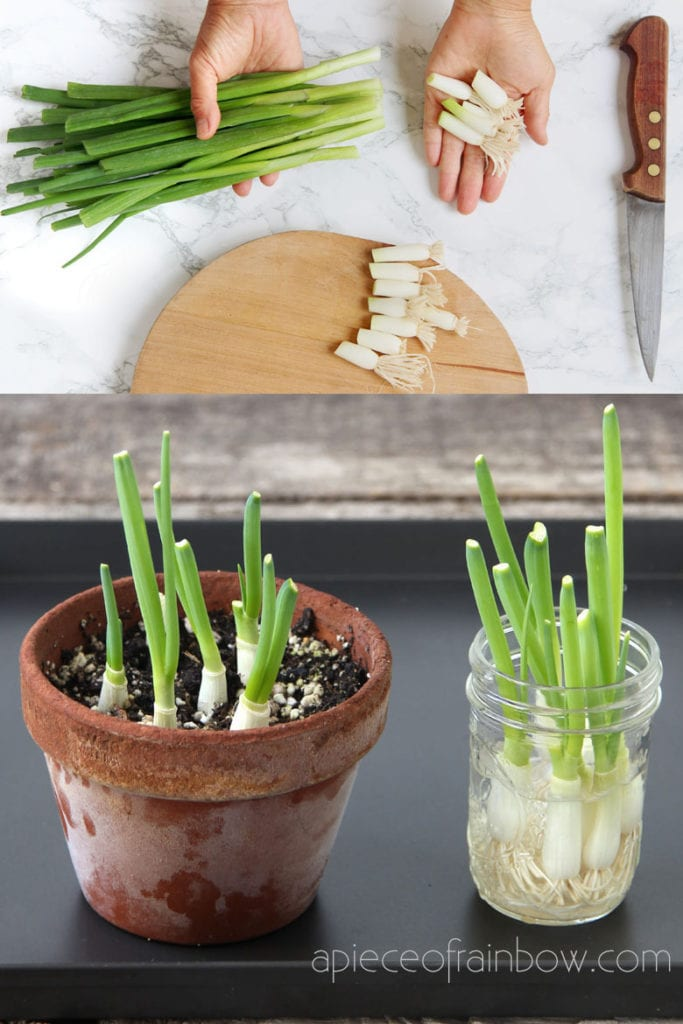
- Spring Onions
- Sort out your spring onions, making sure that they all have at least a few roots growing from the bottom. Take out any that don’t and save them for cooking. The longer the roots are, the better for fast growth.
- Trim the tops of the onions and place them in a glass of clear water with the water just above the point where the onions start to turn green.
- Any kind of jar or glass will work for this, although clear ones mean you get to watch the roots grow!
- Keep the container near a sunny window if you can, so that the onions get some light. In a few days, the onions will start regrowing from the cut area. You can re-cut again and again!
- As you want the spring onions for cooking, just cut off the green part of the onions above the water line and leave the white base part in the jar. Just be sure that you change the water every few days. If you don’t, the whole bottom area will get mushy.

- It should take about a week from cutting the, for the spring onions to start to grow back. If after a week or so there’s no change, your spring onions may have rotted or decided not to grow, if this happens you can try again with different ones.